
How to Change Your Apple ID Account, Password, and Security Questions Tutorial
Many times, we need an Apple ID from another region for convenience. Often, we purchase IDs from other regions at AppleID stores. The seller will provide the account, password, and security questions. To avoid disputes and ensure your ID lasts long-term, it's best to change the security questions and password on the official website as soon as possible.
US Region ID with iCloud Enabled - Purchase
China Region ID with iCloud Enabled - Purchase
Hong Kong Region ID with iCloud Enabled - Purchase
For more ID purchases, you can directly visit our homepage: Global Apple ID Purchase.
Log in to the Apple Official Website
ID official website address: appleid.apple.com
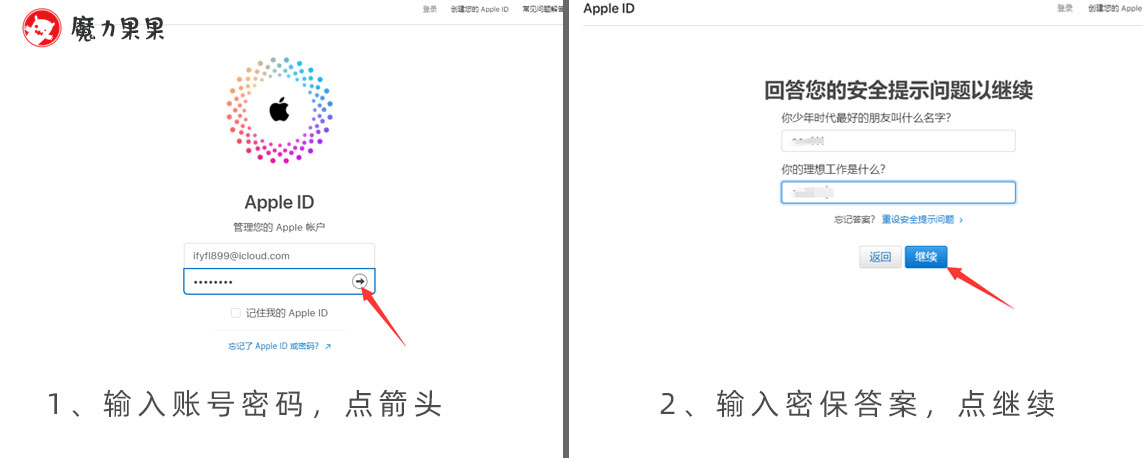
About Security Questions
The answers to security questions vary for each account. Please refer to the product details you received upon purchase. If you haven't finished reading the product details, don't ask what the security answers are—it's just asking for trouble. Also, a reminder: answers don't need to be entered in Chinese. If you can't understand that, you might need a Chinese teacher!
Note: If two-factor authentication (phone binding) is enabled, there won't be a security question option.
About Apple ID Security Alert
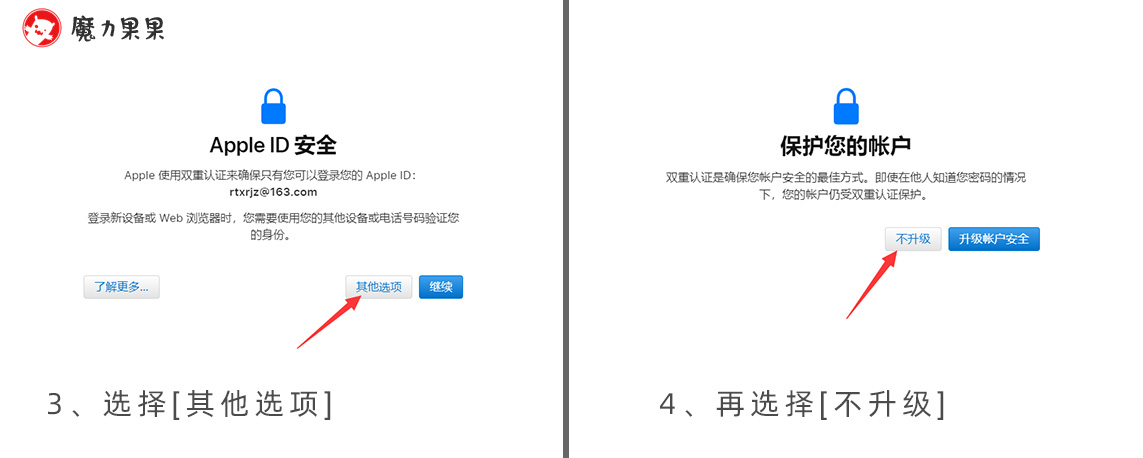
If you see an Apple ID security alert when logging in, meaning it prompts you to bind a phone for two-step verification, click [Other Options] and then [Don't Upgrade] to skip it if you don't want to bind a phone, as shown below. Of course, if you want to bind a phone (recommended, you can use a Chinese phone number), click the [Continue] button 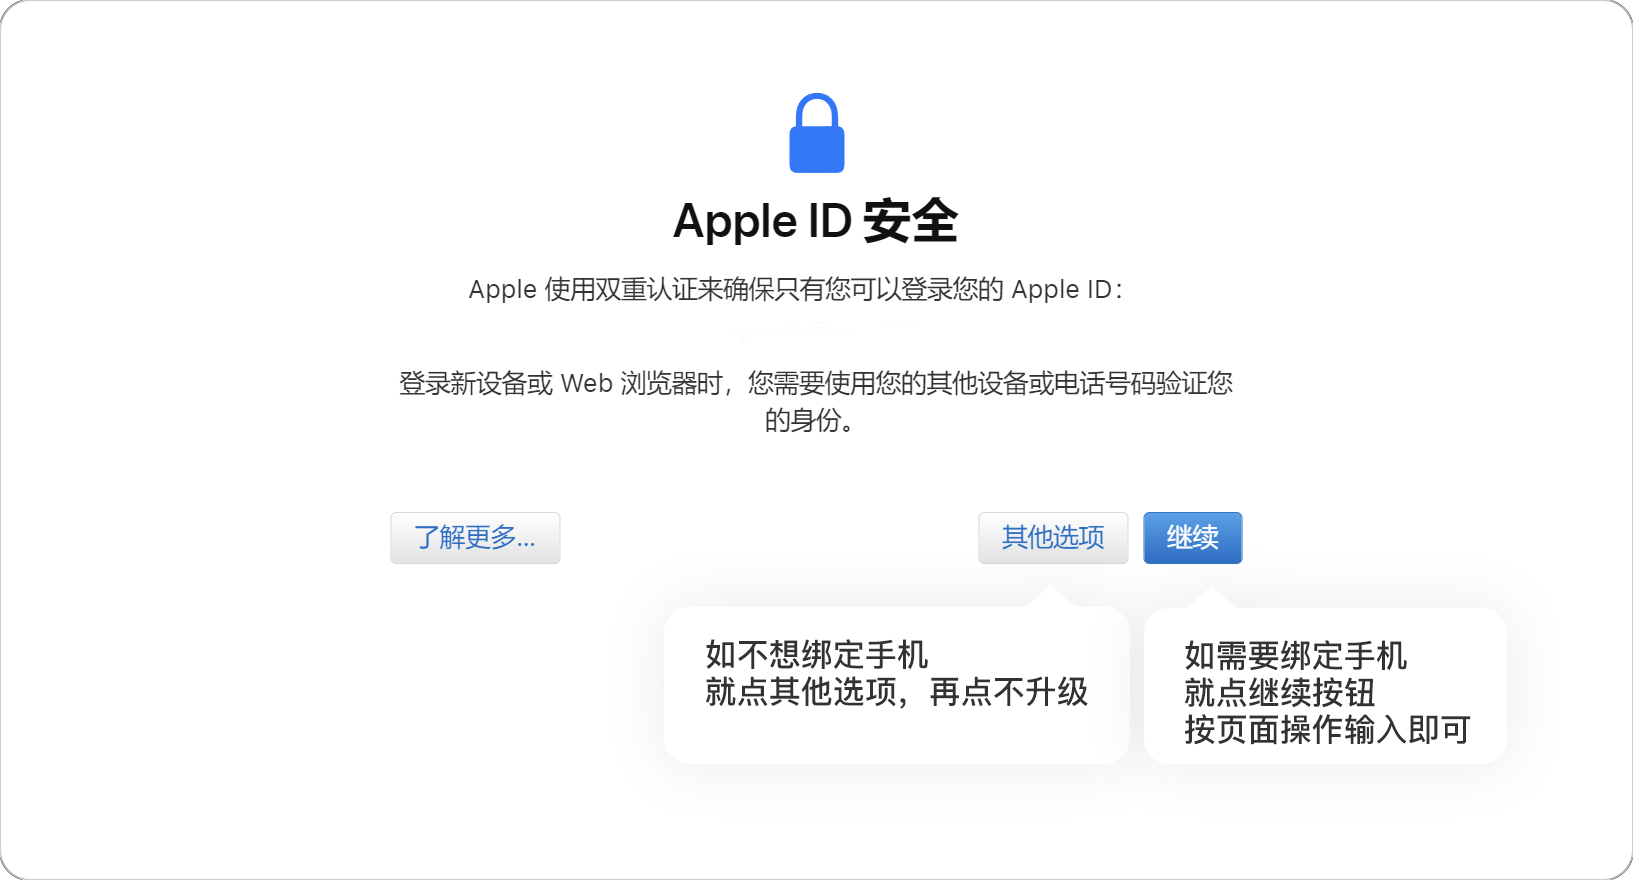
Step 1: Change Email (Apple ID)
Click [Apple ID] to change the email. Change it to your own email; from then on, you'll log in with this email. Note the following points:
Change the Apple ID to your own email—your own email, not one you make up randomly. The new email cannot be one already used by another Apple account; otherwise, you'll see "This email address is not available." The new email can be from any country, domestic or international, as long as it meets the above conditions. Once the email is successfully changed, this Apple account will log in with the new email and have no connection to the old one. Note: After changing the email, don't rush to close the browser or move to the next step. Check if the Apple ID field shows your new email. If not, you haven't successfully changed it—redo it. If it's the new email without issues, this Apple ID will now log in with this email, unrelated to the old one, and the old one will show as invalid. PS: It's recommended not to change the account immediately with a new ID, as it may increase risk control risks.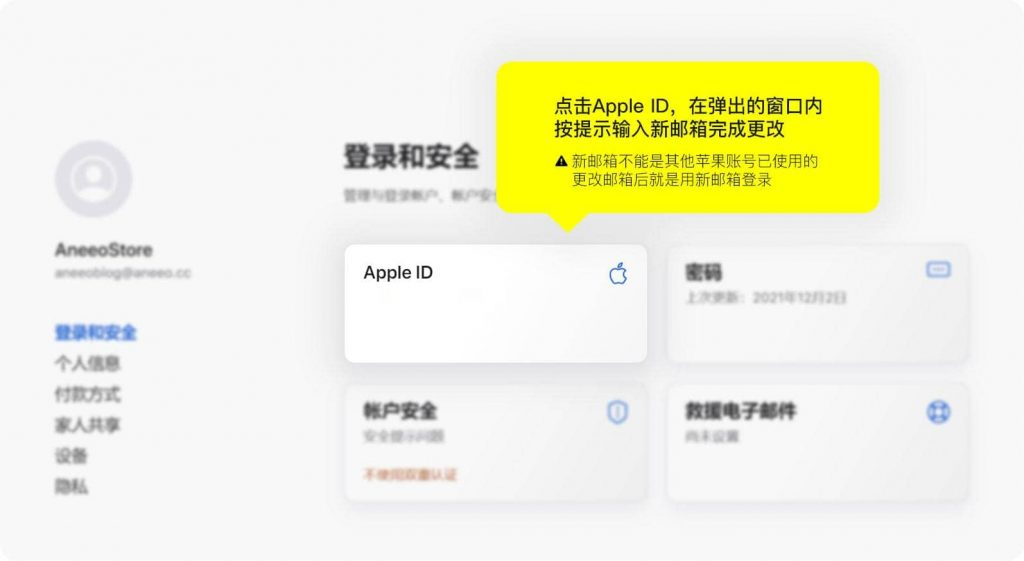
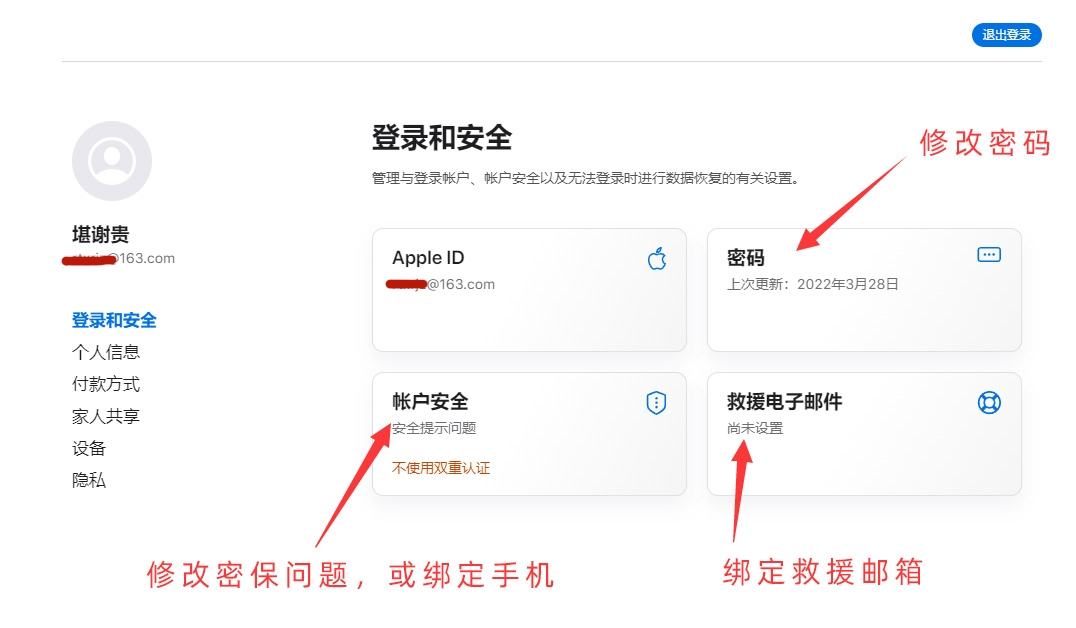
Step 2: Change Password/Security Details
About Billing Address (Optional)
This is optional and not recommended for beginners. Purchases in the US incur sales tax, so if you plan to buy paid items yourself, search online for a US tax-free state address to change your billing address and save a bit of money. Of course, not changing it doesn't affect account usage, and it's not recommended for beginners to change it themselves. If you're not buying paid apps yourself, it's also not recommended to modify it to avoid various strange issues. Additionally, using balance from a new device in a different location may trigger risk control purchase limits, so this site doesn't recommend purchasing paid items yourself!
About Error Messages When Changing Password
If you see a red "Unexpected HTTP response: undefined undefined" error when changing your password, follow these steps to resolve it:
After entering the current password, new password, and confirm new password in all three fields, delete the content in the new password field. Note: Only delete the content in the middle input field; don't touch the confirm new password field. Re-enter your desired new password in the middle field. After entering it, don't click anywhere else. The [Change Password] button below will become clickable—click [Change Password] to proceed.
For more Apple ID tutorials, click: Apple ID Tutorials
 Telegram bot
 Scan for bot